
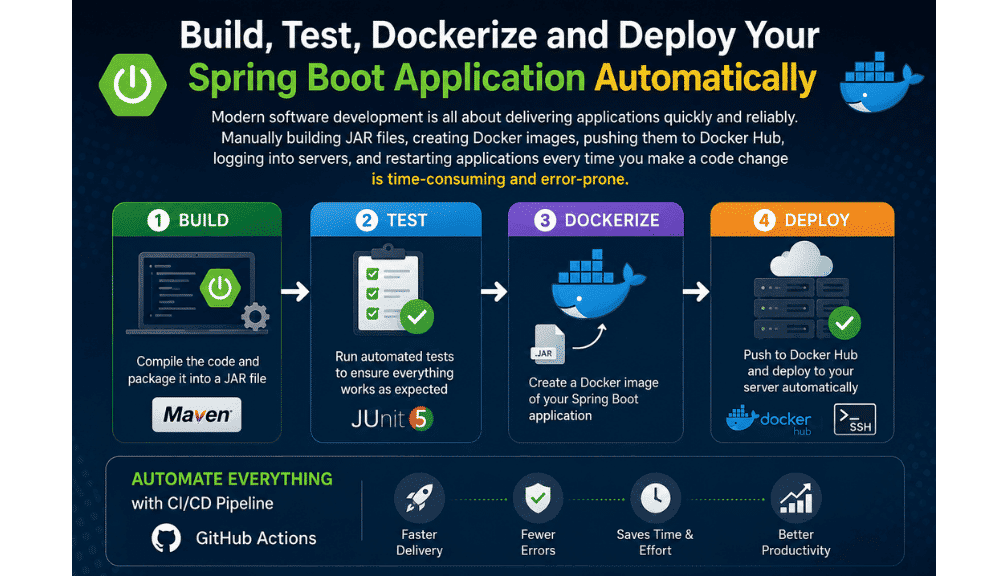
Build, Test, Dockerize and Deploy Your Spring Boot Application Automatically
Modern software development is all about delivering applications quickly and reliably. Manually building JAR files, creating Docker images, pushing them to Docker Hub, logging into servers, and restarting applications every time you make a code change is time-consuming and error-prone.
This is where Continuous Integration (CI) and Continuous Deployment (CD) come in.
In this guide, you'll learn how to build a complete production-ready CI/CD pipeline for a Spring Boot application using:
Spring Boot
Maven
Docker
Docker Hub
GitHub Actions
AWS EC2
By the end of this tutorial, every time you push code to the main branch, GitHub will automatically:
Build your Spring Boot project
Generate a JAR file
Build a Docker image
Push the Docker image to Docker Hub
Connect to your EC2 server
Pull the latest Docker image
Stop the old container
Start the new container
No manual deployment required.
What is CI/CD?
Before writing any code, let's understand the basic concepts.
What is Continuous Integration (CI)?
Continuous Integration is the practice of automatically building and testing your application whenever developers push code.
Instead of manually checking whether your project builds successfully, a CI server does it automatically.
For example:
Developer Pushes Code
        │
        ▼
GitHub
        │
        ▼
GitHub Actions
        │
        ▼
Compile Project
        │
        ▼
Run Tests
        │
        ▼
Generate JAR
Benefits include:
Detects build failures early
Prevents broken code from reaching production
Improves team collaboration
Ensures code always remains deployable
What is Continuous Deployment (CD)?
Continuous Deployment means automatically deploying your application after the build succeeds.
Instead of manually copying files to the server:
Build Success
      │
      ▼
Create Docker Image
      │
      ▼
Push to Docker Hub
      │
      ▼
Connect to EC2
      │
      ▼
Deploy New Version
Benefits:
Faster releases
Zero manual work
Reduced deployment mistakes
Consistent deployment process
Architecture of Our CI/CD Pipeline
Developer

      │

git push

      │

GitHub Repository

      │

GitHub Actions Workflow

      │

Build Spring Boot Application

      │

Generate JAR

      │

Build Docker Image

      │

Push Image to Docker Hub

      │

SSH to AWS EC2

      │

Pull Latest Image

      │

Stop Old Container

      │

Run New Container

      │

Application Live
Prerequisites
Before starting, make sure you have:
Java 21 or Java 17
Maven
Docker installed locally
Git installed
GitHub account
Docker Hub account
AWS EC2 instance
Spring Boot application
Step 1: Create a Spring Boot Project
You can create a Spring Boot project using Spring Initializr or your preferred IDE.
Verify that the application runs:
mvn spring-boot:run
or
mvn clean package
A successful build generates:
target/

    spring-boot-app.jar
Step 2: Create a Dockerfile
Inside the project root, create a file named:
Dockerfile
Add:
FROM eclipse-temurin:21-jre

WORKDIR /app

COPY target/*.jar app.jar

EXPOSE 8080

ENTRYPOINT ["java","-jar","app.jar"]
Explanation
FROM
Specifies the base image.
FROM eclipse-temurin:21-jre
This image already contains Java Runtime Environment.
WORKDIR
Creates the working directory.
WORKDIR /app
COPY
Copies the generated JAR.
COPY target/*.jar app.jar
EXPOSE
Documents the application's port.
EXPOSE 8080
ENTRYPOINT
Starts the Spring Boot application.
ENTRYPOINT ["java","-jar","app.jar"]
Step 3: Build Docker Image
Build the application first.
mvn clean package
Build Docker image.
docker build -t spring-boot-app .
Run it.
docker run -d -p 8080:8080 spring-boot-app
Open:
http://localhost:8080
Step 4: Push Image to Docker Hub
Login.
docker login
Tag image.
docker tag spring-boot-app yourusername/spring-boot-app:latest
Push.
docker push yourusername/spring-boot-app:latest
Now the image is stored in Docker Hub.
Step 5: Prepare AWS EC2
Launch an EC2 instance.
Install Docker.
Amazon Linux 2023:
sudo dnf install docker -y
Start Docker.
sudo systemctl start docker
Enable Docker.
sudo systemctl enable docker
Allow Docker without sudo.
sudo usermod -aG docker ec2-user
Reconnect to the server.
Verify.
docker --version
Step 6: Create GitHub Secrets
Go to:
Repository
↓
Settings
↓
Secrets and Variables
↓
Actions
Create:
DOCKER_USERNAME
DOCKER_PASSWORD
EC2_HOST
EC2_USER
EC2_SSH_KEY
These values remain encrypted and are never exposed in your workflow logs.
Step 7: Create GitHub Actions Workflow
Create:
.github/workflows/deploy.yml
Paste:
name: Spring Boot CI/CD

on:
  push:
    branches:
      - main

env:
  IMAGE_NAME: spring-boot-app

jobs:
  build-deploy:

    runs-on: ubuntu-latest

    steps:

      - name: Checkout Source
        uses: actions/checkout@v4

      - name: Setup Java
        uses: actions/setup-java@v4
        with:
          distribution: temurin
          java-version: 21
          cache: maven

      - name: Build Project
        run: mvn clean package -DskipTests

      - name: Login Docker Hub
        uses: docker/login-action@v3
        with:
          username: ${{ secrets.DOCKER_USERNAME }}
          password: ${{ secrets.DOCKER_PASSWORD }}

      - name: Build Docker Image
        run: docker build -t ${{ secrets.DOCKER_USERNAME }}/spring-boot-app:latest .

      - name: Push Image
        run: docker push ${{ secrets.DOCKER_USERNAME }}/spring-boot-app:latest

      - name: Deploy to EC2
        uses: appleboy/[email protected]
        with:
          host: ${{ secrets.EC2_HOST }}
          username: ${{ secrets.EC2_USER }}
          key: ${{ secrets.EC2_SSH_KEY }}
          script: |

            docker pull ${{ secrets.DOCKER_USERNAME }}/spring-boot-app:latest

            docker stop spring-boot-app || true

            docker rm spring-boot-app || true

            docker run -d \
              --name spring-boot-app \
              --restart unless-stopped \
              -p 8080:8080 \
              ${{ secrets.DOCKER_USERNAME }}/spring-boot-app:latest

            docker image prune -f
Understanding Every Step
Trigger
on:
  push:
    branches:
      - main
Whenever code is pushed to the main branch, the workflow starts automatically.
Checkout Repository
uses: actions/checkout@v4
Downloads your repository onto the GitHub Actions runner so subsequent steps can access your source code.
Setup Java
uses: actions/setup-java@v4
Installs Java on the runner. The Maven cache speeds up future builds by reusing downloaded dependencies.
Build Project
mvn clean package -DskipTests
This command:
Deletes old build files
Compiles the project
Packages it into a JAR
Skips tests for faster deployment (consider running tests in production pipelines)
Login to Docker Hub
Authenticates securely using the credentials stored in GitHub Secrets.
Build Docker Image
Packages your application and runtime into a Docker image.
Push Docker Image
Uploads the image to Docker Hub so it can be pulled from your server.
SSH to EC2
The workflow connects securely to your EC2 instance using your private SSH key.
Pull Latest Image
Downloads the newest image from Docker Hub.
Stop Existing Container
docker stop spring-boot-app || true
Stops the currently running container if it exists. The || true prevents the workflow from failing when the container is not present.
Remove Old Container
docker rm spring-boot-app || true
Removes the stopped container to avoid name conflicts.
Start New Container
docker run -d \
--name spring-boot-app \
--restart unless-stopped \
-p 8080:8080
The options mean:
-druns in the background.--nameassigns a readable container name.--restart unless-stoppedrestarts the container after server reboots.-p 8080:8080maps host port 8080 to the container's port 8080.
Clean Up
docker image prune -f
Removes unused images to free disk space on the server.
Testing the Pipeline
Commit and push your changes:
git add .
git commit -m "Deploy application"
git push origin main
GitHub Actions will execute every step automatically. You can monitor progress under the Actions tab in your GitHub repository.
Common Deployment Issues
Application not accessible
Verify the Docker port mapping.
Ensure
server.portmatches the exposed port.Check EC2 Security Group inbound rules.
Confirm any host firewall allows the port.
Review container logs with
docker logs spring-boot-app.
Docker requires sudo
Add your user to the Docker group:
sudo usermod -aG docker ec2-user
Log out and reconnect to apply the new group membership.
GitHub Actions cannot connect to EC2
Verify the public IP or DNS.
Confirm SSH is enabled.
Ensure port 22 is open in the Security Group.
Check that the private key stored in
EC2_SSH_KEYmatches the server.
Docker image not updating
Force a fresh image pull:
docker pull yourusername/spring-boot-app:latest
Using version tags instead of only latest is also a good practice for production deployments.
Best Practices
Use versioned Docker image tags (for example,
v1.0.0) in addition tolatest.Keep sensitive values in GitHub Secrets.
Run automated tests before deployment.
Use HTTPS with a reverse proxy such as Nginx.
Monitor logs and application health.
Regularly update your base Docker images and dependencies.
Consider blue-green or rolling deployments for zero-downtime releases as your application grows.
Conclusion
A well-designed CI/CD pipeline removes repetitive deployment work and makes releases faster, more reliable, and easier to maintain. By combining Spring Boot, Maven, Docker, Docker Hub, GitHub Actions, and AWS EC2, you can automatically build, package, and deploy your application every time you push code to GitHub.
Once you've mastered this workflow, you can extend it with automated testing, security scanning, infrastructure as code, and deployment strategies such as rolling or blue-green deployments to create a production-grade DevOps pipeline.